Friday, August 2, 2013

Wall Package Prints

We are pleased to announce that we are now offering wall package prints from our favorite professional lab.
 
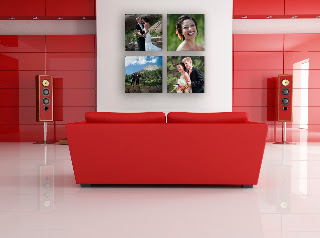
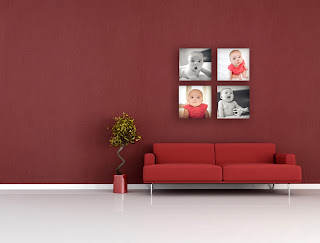
Mount your prints on a lightweight but sleek looking material that is ready to hang out of the box. No framing necessary!

Featured below are a few photos that showcase how stunning these wall package prints will look on your wall.


Available Packages:

Bundle 1
2 - 16 x 24
2 - 10 x 20

Bundle 2
1 - 8 x 10
1 - 11 x 14
1 - 16 x 24

Square Quad 1
4 - 20 x 20

Square Quad 2
4 - 12 x 12

Square Quad 3
4 - 16 x 16

Windmill 1
4 - 11 x 14

Windmill 2
4 - 8 x 12

Triptych 1
3 - 16 x 24

Triptych 2
2 - 16 x 20
1 - 20 x 30

Triptych 3
2 - 8 x 12
1 - 11 x 17

Triptych 4
2 - 8 x 10
1 - 11 x 14

Triptych 5
2 - 8 x 10
1 - 10 x 20

Triptych 6
4 - 8 x 10
1 - 16 x 24
 
 
Call us today at 423-921-0328

Sunday, August 19, 2012

Coordinate Colors for a Photo Shoot


This is one of the most asked questions I get asked when scheduling a photo shoot.  If matching outfits aren't for you, there are other options you can try. Try dressing everyone different but still coordinated. Of course you wouldn't want colors to clash, so my suggestion is for you to choose colors that would come out of the same box of crayons. Keep with a color-scheme (earth tones, bolds, pastels.....) Another option is to choose a color and let individuals express themselves.


Wednesday, June 13, 2012

Bring Props for Your Shoot

Props are a wonderful idea to bring along for a photo shoot.  A favorite stuffed animal or blanket might be just the thing to help your child relax and have some fun.  Remember, you want those beautiful, natural expressions and smiles.


Wednesday, May 30, 2012

Capturing Real Expressions

When I photograph, emotions are one of the main ideas on my mind.  Real expressions from real emotions are what I am looking for.  I ask parents not to tell their children to say "cheese" because this causes a forced smile that just doesn't look real.  It is those different expressions that reflect upon the many facets of a personality and when captured, make a photo believable.


Thursday, May 24, 2012

What to Wear for a Photo Shoot

Clothing style and color are two main things to consider when choosing clothing for your photo shoot.  Remember, knowing how to present yourself while choosing a style that is flattering for your body type is of the utmost importance.

Color matters for the visual appeal of a photograph.  Horizontal stripes give a person the appearance of being wider than he/she actually is, and patterns can be too busy and take over the photo.  Thin stripes or small patterns can make the photos very unusual looking when printed.

Pick colors that suit your skin tone and hair color.  Most of us know which colors look the best on us, and also the colors that just don't work.  If you are uncertain about the colors that look good on you, check some resources such as the internet or magazines and do a little research.

Try to avoid red, black, or white if possible. 

These ideas do not apply in every situation, but they are some things to keep in mind when choosing the clothing style and color for your photo shoot.


Rule of thumb - Solids and neutrals usually work best.


Wednesday, April 4, 2012

Shutter-Priority Mode


Hello again.  In a previous blog, I discussed switching the camera out of the Auto mode and into the (P) mode to enable more creativity in photos.  I want to continue on to another setting on the camera dial - the Shutter-Priority mode.

The Shutter-Priority mode is a semi-automatic mode that allows you to adjust the speed of the shutter while the camera automatically sets the aperture for you.


Shutter-Priority mode is represented by
the (S ) on the dial for Nikon-as shown
in the photo to the left- and Tv (Time value)
for Canon.  *For other brands please refer to your manual*


In order to learn how to use the Shutter Priority mode, it's important to understand the basics of what the camera shutter actually is.  So, imagine a curtain in front of the camera sensor.  That curtain will stay closed until the camera fires.  As the camera fires, the shutter (curtain) opens to allow light to reach the camera sensor.  When enough light is gathered, the shutter will close.  

The shutter speed or exposure time is the length of time the camera shutter (curtain) is open to allow light on the camera sensor.  A fast shutter speed helps to freeze motion completely as shown in the photo below.


A slow shutter speed can create an effect called "motion blur".  This is where movement in the photo appears blurred as shown in the photo below.


So, the shutter speed is responsible for producing dramatic effects in photos by either blurring motion or freezing action.  With practice, I'm sure you'll discover how useful these settings on your camera can be.

Monday, March 26, 2012

Program Mode

If you're interested in taking your photography a step further, play around with your photos by taking your camera out of auto mode.


If I have my camera set to auto, then the camera will not let me make adjustments to any of the settings.  If I set it to P mode (program mode), the camera will still automatically adjust my settings, but I can choose to override those settings. The P mode allows the photographer control over ISO, white balance, exposure, flash, and etc.  The camera might make recommendations while in P mode--like showing a flash icon in the viewfinder--but I can choose whether or not I want to use the flash.  The P mode would be ideal in places where flash photography is not allowed. 

Adjustment settings will vary from camera to camera. Always refer to the manual for details about your specific camera. Though you may feel overwhelmed by all the options that your camera may have, just take it one step at a time. 

Tuesday, March 20, 2012

Composing Your Photo

When composing a photo, always keep in mind the tips listed below:

 - Keep the horizon, buildings, towers, or etc level
 - Crop out extra things (which can make the photo look busy) that you are not interested in
 - Place the object where you believe it should be in the photo rather than just clicking the
   button and settling for where it happens to land in the photo
 - Snap a few sample shots until you get the best photo where all lines direct the eye to the
   main object
 - Don't forget to work with the Rule of Thirds (as discussed in previous tip)

Always pay special attention to the overall balance in your photo whether you're a professional photographer or not because everyone responds better to a picture if all elements are in balance.